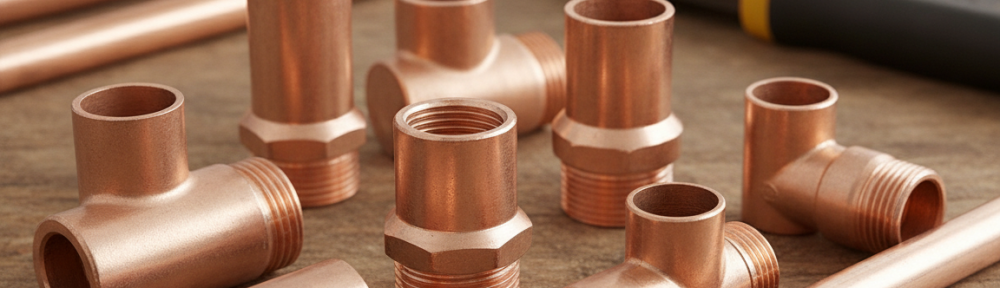
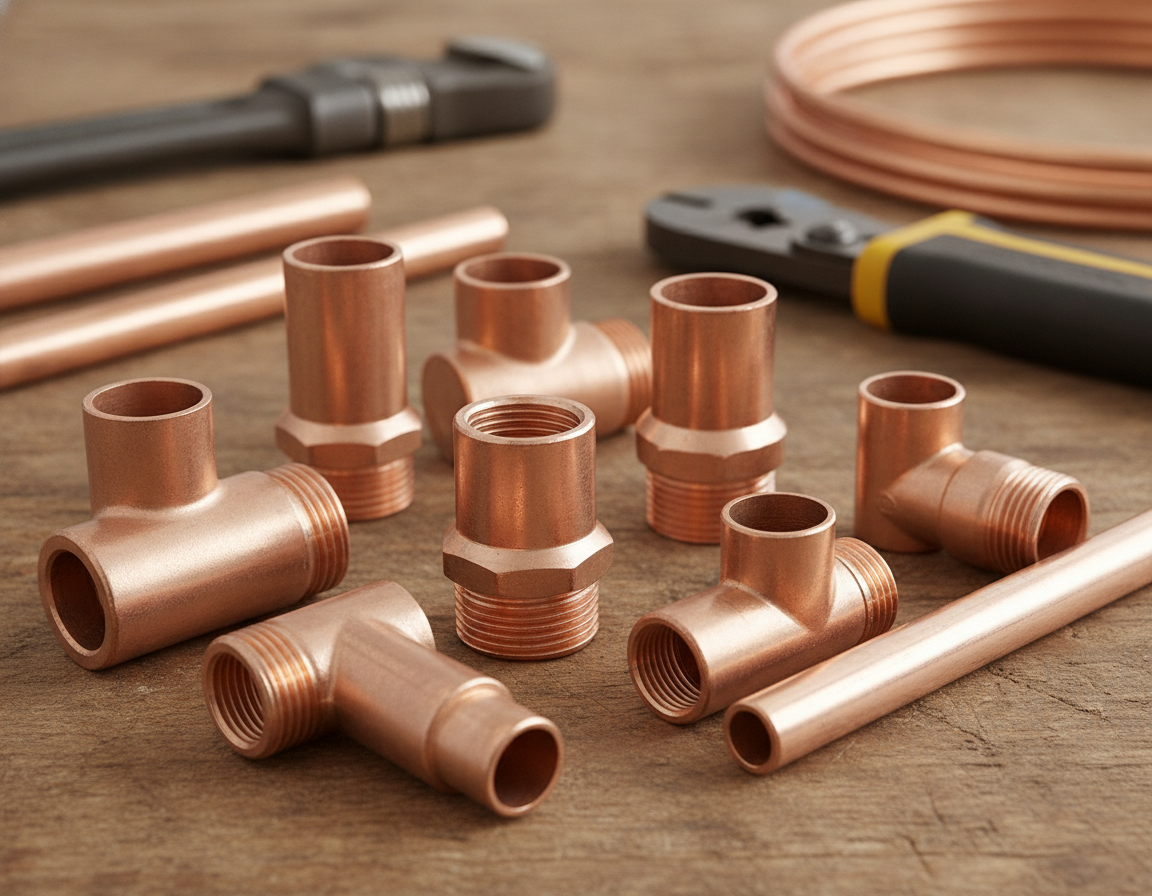
Compression fittings provide a dependable method to connect copper pipes, avoiding the need for welded joints or soldering. Both seasoned plumbers and DIY enthusiasts rely on these connectors for swift repairs and installations. A typical assembly includes a fitting body, a compression ring or ferrule, and a compression nut. As the nut is tightened, it presses the ferrule and builds a tight seal around the tube.
1 2 Compression Tee
For a reliable installation, follow several proven fitting practices. Start by creating square cuts and deburring the tube end. Then look over the tube end for scratches, distortion, or other damage. After assembly, tighten by hand before using a wrench for final tightening. It is best to use two wrenches to prevent the pipe from twisting. Remember, stay away from overtightening and never reuse a compressed ferrule to support a leak-free joint.
Compression fittings are frequently preferred over soldering for many applications. They avoid open flame work and may be reusable in certain low-stress situations. One major benefit is that they can be installed more easily in confined or awkward spaces. However, they are bulkier than soldered joints and may not be ideal in high-stress locations or hidden areas that are hard to inspect. It is essential to use matching components and follow the manufacturer’s torque or turn specifications for optimal performance.
- Copper tubing can be assembled with compression fittings without soldering or open flame.
- Main parts: fitting body, ferrule olive, and compression nut.
- Prepare tubing with square cuts and deburring for reliable seals.
- Use two wrenches, tighten carefully, and avoid overtightening to reduce leaks.
- Select brass or other compatible materials and follow the manufacturer’s instructions.
How Compression Fittings Work And What They Are
Compression fittings connect tubing without solder or heat. They use a simple threaded connection. As it tightens, the connection compresses a ring against the pipe and forms a seal. These joints are useful for tight spaces and field repairs, where a fast connection is essential.
Basic Components
The main pieces are the body, the olive, and the tightening nut. The body contains the seat and thread. The ferrule, often called an olive, sits between the nut and the pipe. When the compression nut threads onto the body, it drives the ferrule into position.
Sealing Principle
The seal is created through radial compression. When the compression nut is tightened, the ferrule is drawn into the tapered bore of the fitting body. That movement allows the ferrule to deform slightly and press against the outside diameter of the tubing.
This creates a line-contact seal that secures the tubing and helps resist leakage. Ferrule design and material significantly affect the seal’s performance under pressure and temperature changes.
Common Names And Variations Across Industries
Across trades, the same fitting style may be described with different names. In plumbing supply and HVAC catalogs, terms such as compression joint, compression couplings, and compression nut are common. Instrumentation suppliers may list compression joints and compression fittings plumbing next to flare fittings, push-fit connectors, and other mechanical options.
| Industry Term | Usual Application | Key Feature |
|---|---|---|
| Tightening nut | Water lines and gas connections | Tightening action compresses the ferrule |
| Olive | Instrumentation and mechanical service lines | Deforms to seal and grip tubing |
| Compression joint | Service repairs and pipe connections | No-solder assembly, reusable in many cases |
| Compression couplings | Extending or joining tubing runs | Straight coupling with ferrule on each side |
| Compression fittings plumbing | Residential and commercial plumbing | Broad size and material availability |
Compression Fittings For Copper Tubing
The choice of material for a compression joint is critical. It affects seal quality, long-term durability, and corrosion risk. Copper fittings are usually a sensible match for copper tubing. They share thermal expansion properties and promote consistent metal contact.
Brass compression fittings, on the other hand, offer ductility. That ductility helps the fitting form a reliable seal without unnecessarily damaging the tube.
For high-pressure or high-temperature service, stainless steel compression fittings are often preferred. They also provide resistance to many aggressive fluids. Plastic compression fittings are suitable for low-pressure domestic water lines. They avoid metal-to-metal contact and can reduce dissimilar-metal problems.
Materials should be matched to the job, pressure rating, temperature, and fluid type. For refrigeration and some plumbing, copper or brass parts are recommended. They minimize mixed-metal stress. When high mechanical strength is required, stainless steel is often the better choice. Just remember, its harder ferrules can deform soft tubing if not sized correctly.
When using copper tubing, try not to pair it with carbon steel or other dissimilar metals. Galvanic corrosion can quickly accelerate deterioration where the metals meet. This reduces the service life. If mixed metals are unavoidable, use dielectric unions, insulating sleeves, or choose compatible materials to limit electrical contact.
Before assembling, examine the tubing’s finish and wall rigidity. Good surface quality allows the ferrule to bite evenly and create a lasting seal. Always follow the manufacturer’s guidance for material compatibility. Following that guidance helps reduce leaks and extend joint life in real-world service.
Copper Tubing Compression Tee Sizes And Types
Choosing the right compression tee is essential, influenced by flow needs, space constraints, and tubing sizes. These fittings are widely used in plumbing, refrigeration, and instrumentation. Ensuring a proper fit between ferrule geometry and body taper is necessary to preventing leaks.
Compression Tee Variants For Tight Spaces
Straight tees support full flow through three aligned ports. Branch tees divert flow into a side line without sharp turns. Compact tees are designed for wall cavities and tight areas where standard tees may not fit. They support common residential sizes, including Compression Tee 1/2.
Common Size Labels And Cross-Fit Options
Installers often order parts by nominal tube OD. The 1/4 Compression T Fitting and 1/2 Compression T Fitting are popular. For small-diameter tube runs, the 1 4 Tee is often used. For larger branches, the 1/2 Inch Compression Fitting and 1/2 OD Compression Fitting are preferred. Cross-fit options such as 1/2 X3/8 and 3/8 X 1/2 Compression Fitting make it possible to mix sizes when required.
Combination Tees And Adapters
Combination tees, such as the 1/2 X 1/2 X 3/8 Tee, handle transitions between sizes. A 1/2 X3/8 adapter changes a 1/2 line to a 3/8 branch. The 1 2 To 1 4 Compression Fitting creates a compact step-down for sensors or instrumentation taps.
Brass Tee And T-Joint Options
Brass is often selected for copper tubing because it offers corrosion resistance and compatible thermal expansion. For durable connections, look for T Brass Fitting options. The 1/2 Brass Tee and 1/2 Tee Brass are common choices for main lines and branch runs. Before mixing brands, confirm thread pitch, ferrule fit, and body taper for a reliable seal.
| Fitting Style | Usual Application | Common Labels | Material Guidance |
|---|---|---|---|
| Inline Tee | Inline branch from main run | Compression Tee 1/2, 1 4 Tee | Brass is commonly preferred with copper tube |
| Side Tee | Side branch off the main line | 1/2 Compression T Fitting, 1/4 Compression T Fitting | Match ferrules with fitting bodies |
| Compact Tee | Small spaces where standard tees will not fit | Common labels include Compression Tee 1/2 | Shorter body while using ferrule compression |
| Reducing Tee | Size transitions and instrumentation | Mixed-size labels such as 1/2 X3/8 | Adapters available: 1 2 To 1 4 Compression Fitting |
| Brass Tee Joint | Corrosion-resistant copper systems | 1/2 Brass Tee and T Brass Fitting | Good copper match when pitch and taper are correct |
When To Use Compression Fittings Vs Soldering Or Other Methods
The best joining method depends on the job conditions, code requirements, and fitting capability. Compression fittings are well suited for tight spaces and areas near flammable materials, as they don’t require flame. Soldering is often better when a permanent, low-profile, visible installation is desired.
Advantages For Quick Installs And Confined Work
Flame-free fittings are helpful for emergency repairs and retrofits because they avoid torches and may reduce hot-work concerns. They only require basic hand tools, making them a go-to for fast fixes. Reusing these fittings is sometimes practical in systems with low stress, which is beneficial for testing or replacing sections.
Profile Limits And Durability Concerns
Compression fittings introduce bulk compared to soldered seams. Once ferrules bite into the tube, fittings can be difficult to remove and reuse. In systems with vibration or pulsation, compression joints may loosen over time, so soldered or brazed connections may be better.
Application Selection Guide
For plumbing repairs in tight spaces, compression fittings are useful when a no-flame connection is needed. For visible runs where appearance is important, soldering is the better choice.
In some gas-line work, compression fittings may be used for short runs. Always check local codes and use approved materials. Inspect joints regularly so safety is maintained.
For HVAC and refrigeration, select copper fittings rated and designed for refrigerants. Where thermal cycling is heavy, brazed or flare joints may outlast compression fittings. Compression fittings such as a Compression Tee Fitting or T Compression Fitting can suit service taps, testing points, and temporary connections.
For instrumentation, select fittings that provide leak-tight, high-pressure, or high-purity lines. Stainless-steel compression options are effective, but confirm they meet pressure and media ratings before installation.
| Comparison Factor | Compression Fitting | Soldered/Brazed Joint |
|---|---|---|
| Tools Required | Basic wrenches and few tools | Heat source, flux, solder, or filler metal |
| Repair Speed | Quick for many repairs | Slower setup, longer cure/cool time |
| Profile | Higher bulk | Slimmer finished appearance |
| Reuse Potential | Limited reuse depending on ferrule condition | Cut-out repair usually required |
| Vibration resistance | Can loosen under vibration if unsupported | Generally stronger under vibration |
| Usual Jobs | Quick repairs, service branches, and accessible joints | Permanent pipe runs and neat visible work |
Choose the joint style according to pressure, temperature, service access, and material compatibility. Compression fittings, including Compression Tee Fittings or T Compression Fittings, are suitable for plumbing, gas lines, HVAC fittings, and instrumentation when serviceability or a no-flame approach is necessary.
Step-By-Step Compression Fitting Installation Guide
Effective installation starts out with thorough preparation and a well-ordered sequence. Every step matters because poor preparation can cause leaks or damage. This section explains how to install compression fittings on copper tubing and when to source compatible parts or tools from Installation Parts Supply.
Proper preparation of copper tubing is necessary. Use a tubing cutter to cut it squarely, then remove any burrs with a reamer. Check the tube end for nicks, scratches, dents, or deformation. Clean the tube and check the fitting and ferrule for damage before starting the assembly.
Begin by sliding the nut onto the pipe, ensuring the threads face the end. Next, place the ferrule olive on the pipe. Insert the pipe fully into the fitting body, ensuring the ferrule seats correctly. Hand-tighten the nut first, align the assembly, and then use a wrench for final tightening.
Proper tightening is central to a secure compression seal. Hold the fitting body with one wrench while tightening the nut with another. Follow the manufacturer’s turn-based instructions instead of relying only on torque readings. Do not over-tighten, because too much force can flatten the ferrule and cause leaks.
Replacement ferrules are often required after disassembly. Once an olive or ferrule has been compressed, it should not be reused. If the ferrule is stuck, remove it with a ferrule puller or carefully cut it off without damaging the tube or fitting body.
Plastic tubing usually needs an insert to maintain shape under compression. Copper tubing generally does not require inserts. After reassembly, slowly open the supply and check for leaks. If necessary, tighten incrementally. For compatible parts and detailed specifications, refer to Installation Parts Supply.
Design And Ferrule Details That Affect Performance
Ferrule selection has a major effect on how a compression joint performs under pressure and over long service periods. Whether opting for a single-piece or two-piece ferrule, each has its advantages and considerations. Ferrule design must match the tubing material, tube size, and fitting body geometry to create a secure, lasting seal.
Common ferrule shapes and material choices
Brass and stainless steel are the most common materials for ferrules. For applications requiring chemical resistance or high-temperature tolerance, graphite or specialty alloys are used. A single-piece ferrule is more straightforward to install and works well with softer copper tubing. On the other hand, a two-piece ferrule includes a rear ferrule, preventing rotation and galling, which is essential for stainless systems.
Choosing asymmetrical or symmetrical ferrules
An asymmetrical ferrule is installed in a specific orientation, supporting consistent performance. It is often preferred for high-reliability applications. A symmetrical ferrule can usually be installed either way, making assembly faster. However, it may perform less reliably on hard plastics where OD tolerance variations can contribute to leaks.
Seal geometry: line-contact versus surface-contact seals
The design of the ferrule controls whether it uses a line contact or surface contact seal. Line-contact seals often resist creep and vibration better. However, overtightening can turn a line-contact seal into broad surface contact, which may increase leak risk over time.
Tubing factors and material behavior
Metal tubing needs smooth walls and accurate square cuts so the ferrule seats properly. Copper tubing from coils can have slight shape irregularities that influence sealing. Soft plastics and PTFE can creep or cold-flow under compression, which may reduce seal integrity over time.
Reducing PTFE cold flow and soft tubing problems
To counteract PTFE cold flow, consider using tubing inserts or redundant internal O-rings. Hardened ferrules can also help distribute the load. In high-pressure or high-purity environments, select materials and lubricants that minimize galling and residue. Ensure that the ferrule material matches the tubing and application requirements to maintain a reliable seal throughout its service life.
Troubleshooting Compression Fittings And Avoiding Common Mistakes
When troubleshooting compression fittings, start with the basics: check the nut tightness, tubing alignment, and ferrule condition. Minor leaks often come from under-tightening, poor tube seating, or a mis-seated ferrule. To prevent tubing damage, hold the fitting body with one wrench and tighten the nut with a second wrench.
Problems from overtightening can cause pipe deformation, crushed ferrules, and persistent leaks. Over-tightening can damage the copper tubing or flatten the ferrule, leading to a poor seal. If you notice flattened tubing or a gouged ferrule, it is best to cut back the tubing and replace it with a new ferrule and nut.
Under-tightening results in a gap, allowing slow leaks. For minor weeps, apply small, incremental turns with a wrench until the leak stops. Use gradual tightening to avoid over-compressing the ferrule while still achieving a reliable seal.
Misalignment and twisting interfere with proper ferrule compression. Make sure the tubing enters the fitting body straight and seats fully. If the ferrule is misaligned, it can jam or become difficult to remove. To remove a stuck ferrule, use a ferrule puller or cut it off and replace it, being careful not to damage the tubing.
Identifying and fixing leaks starts with checking ferrule seating, tube condition, and fitting parts. Any damaged ferrule, nut, or fitting body should be replaced. For a quick fix, incremental tightening can stop small leaks until a proper repair can be scheduled. If the leak persists, consider re-cutting the tube end and reassembling the fitting.
Dealing with corrosion and galling calls for corrective repair and preventive material selection. Corrosion can pit the sealing surfaces, leading to recurring leaks. Galling can seize the nut and body, making disassembly difficult. For stuck nuts, apply penetrating oil and allow time for it to soak in. If threads, tapers, or sealing faces are damaged, replace the affected parts.
Choosing the right materials can prevent corrosion and galling. Do not pair carbon steel directly with copper if galvanic reaction is a concern. Choose ferrules and fittings suited to the system’s chemistry, pressure, and temperature. In cleanroom or high-purity environments, volatile cleaning agents can increase galling risk; use ferrules designed to resist galling and compatible lubricants when allowed.
Stuck nut recovery usually starts with penetrating oil and careful patience. If the nut won’t budge, cutting and replacing the nut and ferrule may be faster than prolonged attempts. Use the correct tools so the fitting body is not damaged.
When a compression joint is not the right choice, other joining methods should be considered. Systems with constant vibration, dynamic stress, or low-profile requirements may be better served by soldered, crimped, flared, or welded connections. When planning repairs or new installs, compare compression and soldering for permanence, profile, accessibility, and code requirements.
| Fault | Likely Cause | First Action | Permanent Solution |
|---|---|---|---|
| Slow leak | Insufficient tightening or ferrule misalignment | Apply small turns while holding the body steady | Install new ferrule and nut and re-cut tube end |
| Leak continues after tightening | Overtightening damage to ferrule or tubing | Cut back tubing, fit new ferrule and nut | Use manufacturer tightening guidance every time |
| Seized ferrule or nut | Compression seat or galling | Penetrating oil; use ferrule puller or cut off | Use compatible materials that reduce galling |
| Corrosion or pitted seal | Incompatible materials or chemical exposure | Install new compatible fitting parts | Choose correct materials and confirm code compliance |
| Leak under vibration | Compression fittings not intended for dynamic stress | Monitor and secure lines to reduce movement | Choose soldered, welded, crimped, or flared alternatives |
Conclusion
In summary, Copper Tubing Compression Fittings provide a versatile, flame-free way to join copper tubing across many applications. They work well when materials are matched and installation techniques are followed correctly. Brass, copper, stainless steel, and some plastics can be compatible when galvanic corrosion and thermal mismatch are avoided.
Installation Parts Supply guidance emphasizes replacing ferrules during reassembly and tightening fittings according to manufacturer specifications. That practice helps maintain reliable sealing.
Choose compression fittings for simple repairs, confined spaces, and removable joints. They do have limits when compared with soldered joints. Long-term performance comes from ferrule design, tubing quality, and correct assembly sequence.
For high-pressure or high-vibration systems, use ferrules rated for these conditions. Consider alternative joining methods when necessary.
This summary stresses the importance of routine checks and careful installation. Make sure cuts are square, clean, and deburred. Use the sliding nut and ferrule correctly, add an insert where required, hand-tighten first, and finish with measured wrench turns.
Use manufacturer torque or turn-count guidance to avoid leaks, ferrule damage, and tube distortion. For matching parts and compatible ferrules, check with qualified suppliers. They should offer 1/4 Compression T Fitting, 1/2 Compression T Fitting, and brass tee options to match your project.